Showing posts with label Quilts. Show all posts

Monday Night Sewing

I had a very productive evening.  Finished the baby quilt top for Emrie. She is due in about 6 weeks, so I should be able to get it quilted and bound before the big occasion. Her nursery will be in pink and brown, with old-fashioned florals. (Sorry the tops of the two quilts below aren't visible because they are hanging over the banister in the stairway.)


I also was able to finish preparing the berries for Bittersweet Briar. They are glued on, but I haven't appliqued them yet. I was supposed to do 13 berries on each of the four vines, but as you can see, I only did 10. Don't call the quilt police -- but I didn't have it in me to do 12 more.


Bedtime for me. My workday starts at 6:00 a.m.

My Baby Lock Espire -- Perfect for Machine Applique

One of the features of my new sewing machine, the Baby Lock Espire, is a pivot feature. When this feature is turned on, the pressure foot automatically lifts up and the needle stays down when you stop sewing. When you once again press on the foot pedal, the pressure foot goes down and sewing again begins. This enables you to keep your hands on the piece being sewn, rather than have to lift the pressure foot with the machine lever. It is perfect for sewing curves because you can sew 4 or 5 stitches, stop, pivot the fabric, and immediately continue on -- never taking your hands off of the fabric.

I've finished preparing the circles to be appliqued to the border (i.e. pressing the seam allowances around the freezer paper) but still need to prepare 52 quarter-sized circles for the yellow berries. I've gotten pretty good at doing the circles, so my guess is that it will take about an hour to do the berries. Hopefully I will have time to do this tomorrow night -- and then stitch them onto the project.  I'd love to finish the quilt top and take it to be quilted asap! I have loved this machine applique technique and have many, many projects in mind to now do!

First 2010 UFO Finished

Finished, that is, with a little help from my mom! This was a paper-pieced project I took as a class at the Country Quiltworks shop in Montgomeryville, PA (about 10 years ago!). The top has been finished for ages, and after seeing a Fons & Porter TV show on big-stitch utility stitching,  I decided to try my hand. And I got about 75% done -- only to have the project get put in the closet after I moved to UT. My mom enjoys different types of stitchery and needlework, so she agreed to finish the big-stitch quilting for me. It is a great little quilt that will definitely get used. I'll be putting it in my red, white and gray office.

Here's a close-up of the quilting.


Winterfest Recap

After two and a half days at the Winterfest quilting retreat -- in the beautiful mountain setting at Daniels Summit -- I am now back home.  I took three classes from Kim Diehl and one from Amy Maxfield, one of the partners and organizers of the event. I feel that I am now well trained in Kim's machine applique technique. Even though I've read (and even tried) her technique through her books, it was wonderful to have the opportunity to see her demonstrate it and learn the many tips and tricks she has perfected in the process of making dozens of fabulous quilts.

Rather than come home with 4 unfinished projects, I spent the time in the 2nd and 3rd Kim Diehl classes continuing to work on the first class' project. I'm glad I did because I actually have something to show for my time away! Here's how far I got on the project while at the retreat. All I have left are the flower buds at the end of some of the stems, some berries, the pieced border with appliqued circles and a circle medallion for the center of the quilt. Here's a link to my post with a picture of Kim's original quilt.


I  love the machine applique technique and look forward to using in on the many applique projects on my to-do list!

I May Have Gone a Little Overboard!

I'm definitely ready to sew some Schnibbles. I don't know that I'm doing the same projects as those who have been making them for the past several months, but I picked the ones I like and am ready to get sewing!


I've also been slow to purchase charm packs and layer cakes -- due to my bountiful stash. But, I stocked up on  some charm packs and a couple layer cakes. I gravitate towards Civil War and Folk Art fabrics, which I know aren't always the best choices when making quilts for my nieces and nephews and new babies. So the charm and layer cake packs are a good way for me to break out of my fabric rut and use fabrics I wouldn't typically purchase.  The Oz and Blush lines are a bit more of a stretch for me -- and I'm looking forward to using them (most likely in a Schnibble). I  love the fabrics, but they aren't "me". Some lucky  family members will probably be the recipients of those quilts.


I can't wait to get started! But tonight I'm doing laundry and cleaning my kitchen since I'll be running errands tomorrow evening -- and then off to the HQNA Winterfest retreat with Kim Diehl. My fabrics are ready for my classes. I just need to make sure I have all of my supplies, and then pack my car for Wednesday! I'm hoping that I'll be able to take some photos at the event that will be of interest  to you!

A Half-Year of Schnibbles

So I missed the "memo" about a Year of Schnibbles. I recently discovered these darling "little quilts" -- and even made my first one before I knew it was quite the rage among quilting bloggers.

I finished this top just before Christmas 2009.


For this quilt I went through my scrap basket and used lots of small scraps. I didn't have enough lights so did have to use a few fabrics from my FQ stash to finish all of the blocks -- but this was a great project for using the miscellaneous pieces that were piling up.

I have since bought many of the other patterns and more than my share of charm packs. So, I'm hoping to make one a month for the next several months. I haven't done much machine quilting, but these are just the right size for me to hone my skills.

Spinning Stars Test Block

Do you do test blocks? I do, especially if I'm going to be making  a lot of the same block. I want to figure out the most efficient way to make the block. For example, can I strip piece and then sub-cut some of the units? Should I cut some of the pieces a tad bigger and then trim the unit to size after it's been sewn? Which way should I press seams to make construction clean and easy? Where will I want to carefully pin so points and seams all match up? You get the picture.

So, I made a test block of my Spinning Stars quilt since it was a block I drafted in EQ6 and I wanted to make sure I had worked out the best way to approach it before getting too far into the quilt. In fact, I ended up making 1 test block out of scrap fabric, and then another using the background fabric that I'm using throughout my quilt -- in hopes that the block will be a keeper. I'm glad I did a test because even though the block is fairly simple, I found that there are lots of places where I'll need to match points on both units being sewn together. Then I realized that I would have to match two points for every block joined to another block -- and with 32 blocks set on point that was going to be time consuming.

The result? I ended up re-drafting the block so that the star points "float" in the background fabric. I'll still need to match where the flying geese units join up to the square-in-square blocks, but I won't need to be as precise when sewing the blocks into rows. You can see the before and after below:

 Block before


Block After


I'm still working out the dimensions for how far the star  will float in the background fabric -- so it may only be 1/2 inch from the outside of the block, rather than what I think is 1-1/2 inch in the picture.

Quilt Before


Quilt After


I actually think I like it better after -- because the stars seem to float even more. (I didn't take the time to change the colors in each of the blocks -- but each block will use two fabrics that are unique. So the entire quilt will use 64 fabrics + background + borders + backing.  And, as I mentioned  in my original post about this quilt, I'm still going to figure out something different for the borders.

I guess I'll be making another test block!

Time to make another 30s quilt?

I've made two quilts with 30s reproduction fabrics. My niece was the recipient of one of them when she got married. The pic below is before it was quilted. This is the link to see the finished quilt.


I still have the other quilt, which is a sampler with both 12-inch and 6-inch blocks, and a "piano key" border.


The quilt underneath my quilt is the quilt my grandmother made for my mother when she was married in 1952. It's a scrappy double-wedding ring quilt with coral and aqua in the 4-patch units that connect the pieced melons. Of course, it's hand-quilted, but my mom can look at it and pick out fabrics that were used in clothes she wore as a child or aprons my grandmother wore. It's a true heirloom that I treasure. You can see a hint of the edge of the quilt and how my grandmother kept the scallop-y edge.

Anyway, I still have loads of 30s fabrics and a full bolt of good-quality white fabric. So, in the true spirit of stash-busting, I guess it's time to make another 30s quilt -- although there are so many new 30s prints that I haven't seen before that I might be tempted to buy a few.

Here are a few quilts I've noticed lately that will serve as inspiration to get started:


I LOVE this darling apron quilt.


From Lori Holt,  Bee In My Bonnet


I'm thinking this is the one I'm going to make!! From www.fabricessentials.com


Free Quilt Project: Plaza Mayor Quilt

I lived in Madrid twice as a student -- 6 months each time. I've returned to visit Spain on four other occasions. My favorite spot in Madrid is the Plaza Mayor -- and of course, the famed Sobrino de Botin and Casa Paco restaurants, as well as the many tapas "cuevas" (caves) that surround the plaza.

Although this quilt design wasn't originally inspired by the Plaza Mayor, after it was completed I knew that its name would be  "Plaza Mayor" because it reminded  me of the concrete and stone design on the ground of the plaza. And, of course, the warm, rich colors I chose or my quilt remind me of Spain. The name was also perfect since I made the quilt for my nephew who served a 2-year LDS mission in Madrid.

The quilt:

(Sorry, this is the best photo I have of the quilt. I didn't anticipate turning this into a pattern before I gave the quilt away.)

Here's  the quilt image from Electric Quilt 6:


The Plaza Mayor (you can kind of see the pattern on the ground):


Finished quilt size: 68" x 81.5" (perfect for a twin-sized bed and will work with twin-sized batting)
Number of blocks: 20 (although it is an easy quilt to make bigger or smaller)
Finished block size: 12" x 12"

Fabric Requirements

  • 16 coordinated fat quarters (18" x 22"), for blocks. Select fabrics in a variety of colors, scales and values -- light, medium light, medium, medium dark, and dark
  • 1-1/4 yard light fabric, for sashing
  • 1-1/2 yard dark fabric, for sashing, inner border and binding
  • 1-1/4 yard medium or medium dark fabric, for cornerstones and outer border
  • 5 yards, backing (pieced lengthwise)

Cutting:
  • Cut fat quarters into 16-inch squares. See steps 1 and 2 for how to do this.
  • Cut light sashing fabric into 9 4-inch strips, across the width of fabric (WOF)
  • Cut the dark sashing fabric into 14 2-inch strips, across  WOF; save remaining fabric for binding (8   2-1/2-inch strips)
  • Cut medium or medium-dark cornerstone/outer border fabric into 8 4-1/2-inch strips, across WOF and set aside; cut 2 2-inch strips, sub-cut into 35 2-inch squares
Note:  If you pre-wash your fabrics, press them well after spraying with Mary Ellen's Best Press clear starch alternative or with fabric sizing.

Step 1:
Organize your fat quarters into 5 sets of 4 fabrics, being sure to vary the color, scale and value of the fabrics within each group. Label as groups 1 through 5.


Before cutting, make sure you have a sharp blade in your rotary cutter as you will be cutting through four layers of fabric. Layer the fat quarters from Group 1 fabrics on the cutting mat with right sides up and in random order. Align the left and bottom edges as closely as possible, with the selvage to the far right.


Cut a sliver of fabric from the left and bottom edges, ensuring that all  four fabrics were cut.


Cut the layer into a 16-inch square.  This is easiest if you have 16- or 24-inch square ruler. My largest square ruler is 15 inches, so I needed to combine it with a 24" x 6" ruler to cut my pile of fabrics.

Before moving or separating fabrics, sub-cut the squares as instructed in step 2.

Step 2:
Working with the first stack of four 16-inch squares, make vertical cuts: 4 inch strip, 2 inch strip, 4 inch strip, 2 inch strip, and 4 inch strip -- in that order working across the fabric pile.


After making the vertical cuts, rotate the strips 90 degrees and put the strips next to each other, making sure the fabric strips are aligned. Then make the next series of cuts in the same way: 4 inches, 2 inches, 4 inches, and 2 inches, leaving 4 inches.


The pieces that measure 2" x 4" are the A pieces.
The pieces that measure 2" x 2" are the B pieces.
The pieces that measure 4" x 4" are the C pieces.


Step 3:
This step will mix and match your fabrics such that you will have four blocks, each with 3 of the fabrics from the set. For each of the twelve A piles, bring the fabric from the bottom of the pile and place it on top of the pile. For each of the four B piles, take the top two fabrics and place them at the bottom of the pile (the top fabric will now be the third fabric in the pile and the fabric that was the second in the pile, will now be on the very bottom). Do not move any fabrics in the piles of piece C.


Step 4:
Repeat steps 1 through 4 for fat quarter Groups 2 through 5. You will now have fabric combinations for 20 blocks.

Step 5: Sew one block at a time.
Use the pieces in the top layer of Group 1 piles to make the first  block. Press all seams to piece A. Sew the block into rows and then sew the rows together. The block will now measure 12-1/2 inches square. Complete all 20 blocks. (Of course you can chain piece multiple blocks -- you'll just need to pay attention to which block you are working on because it's easy to mix up the fabrics.)

Step 6: Piece the sashing. You will need 9 light 4-inch strips and 6 dark/medium-dark 2-inch strips. I find it easiest to sew strips together and sub-cut  into the pieced sashing.

However, it's difficult to evenly press such long pieces. I suggest you trim the selvage edges off each of the strips and then cut each into four equal pieces. You'll now have 36 4-inch strips and 24 2-inch strips that are each approximately 10-1/2 inches long. Sew together a sashing set as follows: light 4" - dark 2" - light 4" - dark 2" - light 4". (Photo to come.)

Press all seam allowances to the light 4" pieces. Make 12 sets.

Sub-cut each set into 5 2-inch strips. (Photo to come.)

Sew a dark cornerstone to one end of 21 pieced sashing strips, pressing seam allowances to the light 4" piece;  label these sashing strips "A". Sew dark cornerstone pieces to both ends of 7 pieced sashing strips, pressing seam allowances to the light 4" pieces;labelthese sashing strips "B". Label the remaining 30 sashing strips (without cornerstones) "C".

Step 7: Sew the horizontal sashing rows.
Lay out sashing strips A and B horizontally, with three A pieces and then one B piece. Sew seven horizontal sashing rows.

Step 8: Assemble the rows of blocks to make the quilt center.
Lay out your blocks and vertical sashing strips. You will sew a C strip to the left side of each block, and sew a C strip to the right side of the last block in each row; then connect all of the blocks in the row.

Sew a sashing row from step 8 to the top of each finished row of blocks, and one to the bottom of the bottom row of blocks. Then sew the rows into the finished quilt center. The quilt center should now measure 56" x 69.5".

Step 9: Inner borders.
Use the eight 2"  x WOF strips of dark fabric to piece two 69.5"-long strips and two 59"-long strips. (Measure your quilt and make sure these lengths will work for you. Adjust as needed.) Join a 69.5" strip to the right and left sides of the quilt center. Press the seam allowances toward the border. Join a 59" strip to the top and bottom edges of the quilt center. Press the seam allowances toward the border. The quilt center with inner borders should now measure 59" x 72.5".

Step 10: Outer borders.
Use the eight 4-1/2" strips of medium or medium-dark fabric to piece  two 72.5"-long strips and two 67"-long strips. (Measure your quilt and make sure these lengths will work for you. Adjust as needed.) Join a 72.5" strip to the right and left sides of the quilt. Press seam allowances toward the border. Join a 67-inch strip to the top and bottom edges of the quilt. Press the seam allowances toward the border. The quilt center with outer borders should now measure 67" x 80.5".

Step 11: Quilt and bind using your preferred methods.

Here is a link to a pdf of these instructions.

I hope you enjoy this quilt.  Please leave a comment if you have any questions. If you make the quilt, please send a photo and I'll post it for others to see.


Decorating With Quilts

I love the look of quilts throughout the house -- but if you're like me, you've got more quilts than places to put them.  Other than one quilt on the wall over my stairwell, I haven't hung any quilts. (Probably because I'm too lazy to sew a sleeve on the back to hang it.) So, I have used quilts in other ways throughout my house -- in mostly traditional  ways.


The railing around my stairwell is the most prominent place for showcasing my quilts.


And, no, there isn't  a quilt on the floor. The rug just has an Ohio Star pattern.

Since my living room couch has individual pillows along the back of the couch, it was easy to drape the quilt on the back of the couch and then replace the couch pillows.


Using a quilt as a throw over the back or side of a chair isn't earth shattering -- but I still like the look.


I use a quilt like a tablecloth -- but do remove it when it's time to eat at the table.


Of course, the bed is still the most logical place to find a quilt.


So I decided to do a Google search to find other examples of decorating with quilts. I hope these photos give you some ideas. I know there are a few that I'll be using.

From a charming blog named Seasons for All ... At Home, I found a  post with the following ideas and photos:


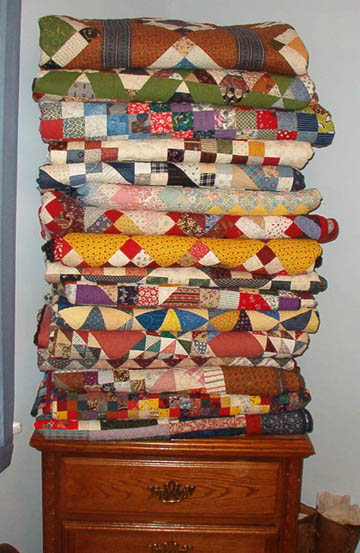
This was a great photo from Bonnie Hunter's Quiltville website.  I too have a "leaning tower of quilts" -- I just haven't had  the courage to photograph it! Maybe I will one of these days.


I love the way this quilt is "hung" on the wall -- draped over a decorative, wooden curtain rod. I think that's what I should do to feature a quilt at the head of my bed because no sleeve is required -- and it would  be easy to switch with a different quilt throughout the year.
I have several flower girl blocks that were appliqued by my grandmother (who was born in the 1890s). This would be a terrific way to feature those blocks rather than put them into a quilt. I have enough  blocks to sew into a quilt, but perhaps this would be a way to share these family heirlooms with her great- and great-great-granddaughters.

 
What fabulous ways to use an antique ladder or railing to show off quilts.


Rather than stack quilts, how about rolling the small ones and place them like "books" on a shelf. Whoever staged this display did a great job featuring the quilt blocks at the front of the roll.

Or here's the more traditional way, stacked quilts in a cabinet. Still charming!


LinkWithin